Tuesday, March 31, 2009

Misty Field


Monday, March 30, 2009


Misty Field - pastel stage 2

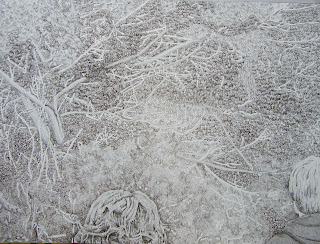
Today, I did some logic briefly and then went back to my pastel painting -- Misty Field. I finished stage 2 where the base actual color was placed down on top of the complementary colors. Next is the fine tuning stage where detail and texture is created.

Sunday, March 29, 2009

Great Logic

Logic is a very wonderful form of math. Here is one of probably 50 proofs I have done in the past week.

Tuesday, March 24, 2009

Logic Beauty


I have mentioned the beauty I find in mathematics before, but I am just.... beyond words with the logic course I am currently taking. It is wonderful! I am doing ALL of the proofs! I was up at 1 AM this morning still doing them. Symbolic logic is so beautiful and, for me, incredible fun. Wonderful, wonderful logical patterns........

Sunday, March 22, 2009

Misty Field - Stage 1


Today, I began the pastel version of Misty Field. From earlier posts, you might remember that stage 1 is blocks of complimentary color so it always looks bizarre. This time, I will not post as many photos; just one of each stage.

Thursday, March 19, 2009

Misty Field


Finally, I have a watercolor that I felt remotely good about. I still have a long way to go but I am definitely improving! I am also going to do this image in soft pastel.

Tuesday, March 17, 2009

Use For Cheap Meatloaf Pans

My UVA teacher told the class about a professional pastel artist who has a table with a huge tray to catch the pastel dust. The dust can be hazardous as some colors use cadmium and cobalt. Truly dust was a problem last time a did a pastel painting at home. So I bought some cheap aluminum meatloaf pans and voila!


------------------------------------

3/22/09

I guess I have to work on the meatloaf pans. One fell off last night with a loud clatter that woke everyone up!

Monday, March 16, 2009

Palettes Passed Down


As a new watercolorist I am trying to find "my palette". Most artists find a link to certain colors; colors they connect to, colors they think ill work with their style. As I am truly struggling to find any style of any kind, I am searching through quite a few colors. So I have outgrown having only one palette.

This weekend, I was cleaning up the ubiquitous "room over the garage" and found my father's old John Pike palettes. I realized that he would have loved to have one of his own children using his watercolor palettes (too bad I did not inherit his brushes, paper, etc.). So today, I cleaned both of them, and will now get ready to use. They are old so they are sturdier than the newer ones; in fact, they are wonderful. thank you so much for passing them on to me. I will use them with joy, even if my paintings suck!

Thursday, February 26, 2009

Complete Ink Self-Portrait


I just realized that I have not posted the complete ink self-portrait series, so here it is!

"Finished Drawing" Is Finished


Finished Drawing is complete. I sprayed it with Sennelier soft pastel fixative (several light coats). It was done with Winsor Newton soft pastels on Stonehenge 90 lb. 22" by 30". At some point, I will frame it and display it in shows.

Final Stage 3


Here is the final stage 3. The next step is the "tweaking" stage where I straighten lines, coordinate colors and do the final work on the background. Then I spray with fixative and later frame it.

Wednesday, February 25, 2009

And More Stage 3


More Stage 3


Step 2 Finished


Step 2, where the inherent colors are placed down, is now finished. Next step 3 where each objects is taken close to completion will be accomplished. I believe that I will do all of the paint tubes first and then the brushes and then the cloth,

Tuesday, February 24, 2009

Step 3 on One Object


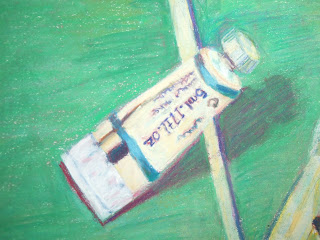
I have begun step 3 which is working each object towards its completed form. One tube of paint is now at this point (the brush handle underneath is still in stage two). Once all of the objects are almost completed, I will work the entire piece all at once to unify everything.

Step 2 Continued


Tonight, I continued the second step where that complimentary colors are replaced with the color inherent to the object. the picture below shows about half of this process completed. the other half still must be done, so I am off to the studio!

Monday, February 23, 2009

Step 3 on Background


The third step is to work the area with further layers of color to make it rich in color. i have also put in the first, complimentary color, layer for the cast shadows for some of the objects.

Step 2 on Background

The next step is to place the actual values down on top of the complimentary ones. I have dpne this in the background only.